

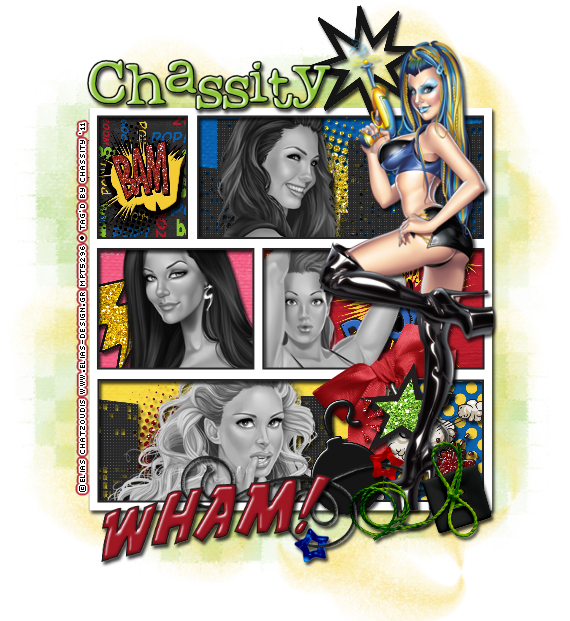
I've used the lovely PTU artwork of Elias Chatzoudis. Get it at MPT.
This is PTU kit called BOOM! POW! from Designs by Sarah. Get it at PMTw/S.
I used masks Vix-Mask365 and 414 by Vix PSP.
Font used is Problem Secretary.
Let’s Begin!
Open a new canvas that’s 800x800 pixels.
Open frame1 from kit.
Copy and Paste it as a new layer.
Resize it down as needed.
Apply each of these papers to the windows indicated.
Erase any portion of the paper hanging outside of its window.
Paper pp1 to bottom left
Paper pp7 to bottom right
Paper pp4 to middle left
Paper pp2 to middle right
Paper pp8 to top left
Paper pp3 to top right
Add your tubes to the four windows as shown.
Resize and arrange them to your liking.
Erase any portion of the tubes hanging outside of the window.
Apply Black and White by going to
Effects>Photo Effects>Black and White Film- everything set to 0
Add the following elements to the windows indicated behind the tubes.
Resize to fit and erase any portion hanging outside of its window.
Halftone1 and cityscape to bottom left
Pop and splat2 to bottom right
Deco3 to middle left
Boom w bomb to middle right
Bam to top left
Halftone2 and cityscape (mirror it) to top right
Copy and Paste your final tube above the frame.
Resize and arrange to fit.
Copy and Paste the following elements above the frame in this order.
Resize and arrange them as shown.
Clippyonbow2
Star4
Deco2
String2
Wham
Deco1
Button3 (paste above tube)
Open paper pp5 from kit.
Copy and Paste it at the bottom of the tag.
Add your mask by going to Layer>Load/ Save Mask>Load Mask from Disk.
Apply the mask named Vix-Mask365.
Merge the mask group by right clicking the layer of the finished mask, go to Merge>Merge Group.
Resize and arrange it to fit as shown.
Follow the same procedure with paper pp1, and apply Vix-Mask414.
I used the font Problem Secretary. Set it to a size you like and a stroke width of 3.
Foreground color to black and background color to #8bc533.
Duplicate the layer and select the second font layer with the font tool.
Set the stroke width to 0.
Duplicate this second font layer.
Go to Effects>3D Effects>Cutout with these settings
Vertical-1, Horizontal-2, Opacity- 100, Blur-2
Merge all the font layers and convert to a raster layer.
Drop shadow everything except the mask.
Effects>3D Effects>Drop Shadow, set the drop to 3 vertical, 2 horizontal, 75 opacity, 4 blur.
Add your copyright info and your tag.
Merge everything in Layers>Merge>Merge Visible
Crop and resize as needed!
All Finished!
No comments:
Post a Comment