

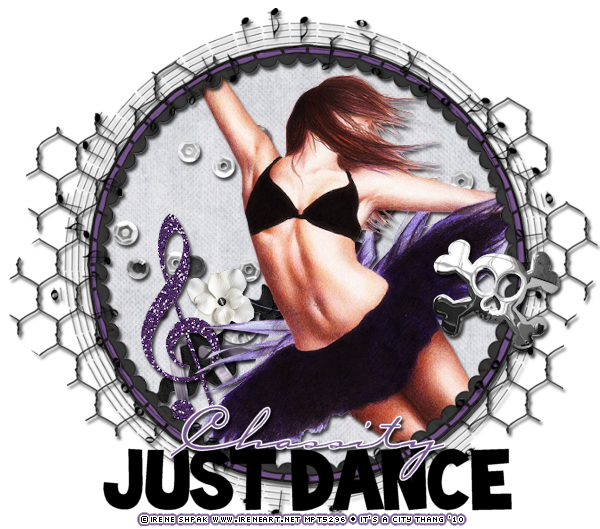
I've used the lovely FTU tube by Irene Shpak. You can get it HERE. You still need a MPT license to use this tube. If you don’t have one, request one from customer service.
This is a PTU tagger kit called Rock Me by Cora’s Creations (Pimp'd Designz). Visit her blog for links ot her store HERE.
Font used is Toonish and Carpenter.
Let’s Begin!
Open a new canvas that’s 800x800 pixels.
Open frame-05 from kit.
Copy and Paste it as a new layer.
Open paper pp-02.
Using your magic wand tool select within the frame.
Selections>Modify>Expand- 6
Copy and Paste your paper as a new layer.
Selections>Invert, hit the Delete button on your keyboard to delete the excess.
Move the paper below the frame.
Copy and Paste your tube above the paper.
Layers>Duplicate
On the upper tube go to Adjust>Blur>Gaussian Blur- 3
Layers>Properties- Blend Mode to Soft Light
Open beads-01 from kit.
Copy and Paste it behind the tube.
Resize and arrange it as shown.
Effects>Photo Effects>Black and White Film
Brightness and Clarify set to 0.
Open ribbon-03 from kit.
Copy and Paste it as a new layer.
Resize and arrange it as shown.
Open flower-03 from kit.
Copy and Paste it as a new layer.
Resize and arrange it as shown.
Open music-note-05 from kit.
Copy and Paste it as a new layer.
Resize and arrange it as shown.
Open music-note-04 from kit.
Copy and Paste it above the frame.
Resize and arrange it around the frame as shown.
Open skull from kit.
Copy and Paste it as a new layer.
Resize and arrange it to the right as shown.
Open wire from kit.
Copy and Paste it underneath everything.
Resize and arrange it as shown.
I used the font Toonish for “JUST DANCE”.
Set it to a size you like and the color to black.
I used the font Carpenter for the name. Set it to a size you like, and a stroke width of 3.
Foreground color to white and background color to #7a5793.
Duplicate the layer and select the second font layer with the font tool.
Set the stroke width to 0.
Merge the 2 font layer and convert to a raster layer.
Drop shadow everything except the mask.
Effects>3D Effects>Drop Shadow, set the drop to 3 vertical, 2 horizontal, 75 opacity, 4 blur.
Add your copyright info and your tag.
Merge everything in Layers>Merge>Merge Visible
All Finished!
No comments:
Post a Comment