Sunday, February 20, 2011

Cool Treats- PTU


Download this tutorial in a PDF file.

I've used the lovely PTU artwork of Elias Chatzoudis. Get it at PTE.
This is PTU kit called Cool Treats from TammyKat Dezigns. Get it at PMTw/S.
The mask is Vix_Mask363, by Vix PSP.
Font used is Toonish.


Let’s Begin!

Open a new canvas that’s 800x800 pixels.

Open blueframe from kit.
Copy and Paste as a new layer.
Resize slightly to give yourself room and center.

Copy and Paste your tube as a new layer.
Resize the tube as needed and center on top of frame as shown.

Open icecreampaper from kit.
Copy and Paste it below the frame.
Resize it to fit inside the frame and erase any portion hanging out.

Open coolnsweettile from kit.
Copy and Paste it above the frame.
Resize and arrange it to the left as shown.

Open topingborder from kit.
Copy and Paste it as a new layer.
Resize and arrange it to the bottom as shown.

Open greenribbon from kit.
Copy and Paste it as a new layer.
Resize and arrange it to the bottom as shown.

Open pinkcart-shadows from kit.
Copy and Paste it as a new layer.
Resize and arrange it to the right as shown.

Open acrylicgreenpopsicle from kit.
Copy and Paste it as a new layer.
Resize and arrange it to the right as shown.

Open popsiclebutton from kit.
Copy and Paste them as new layer.
Resize and arrange it to the bottom right as shown.

Open cherry from kit.
Copy and Paste it as a new layer.
Resize and arrange it to the bottom right as shown.

Open pinkpaper from kit.
Copy and Paste it at the bottom of the tag.
Add your mask by going to Layer>Load/ Save Mask>Load Mask from Disk.
Apply the mask named Vix_Mask363.
Merge the mask group by right clicking the layer of the finished mask, go to Merge>Merge Group.
Resize and arrange it to fit as shown.

I used the font Toonish. Set it to a size you like and a stroke width of 3.
Foreground color to white and background color to #71b9e3.
Duplicate the layer and select the second font layer with the font tool.
Set the stroke width to 0.
Merge the 2 font layer and convert to a raster layer.

Drop shadow everything except the mask.
Effects>3D Effects>Drop Shadow, set the drop to 3 vertical, 2 horizontal, 75 opacity, 4 blur.

Add your copyright info and your tag.

Merge everything in Layers>Merge>Merge Visible

Crop and resize as needed!


All Finished!

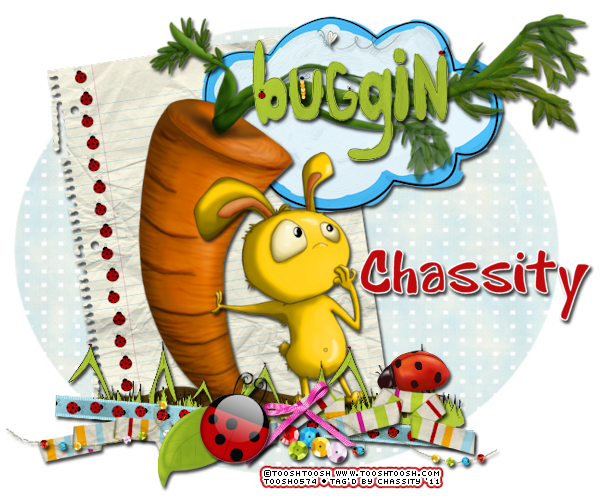
Don't Bug Me- PTU


Download this tutorial in a PDF file.
I've used the lovely PTU artwork of Toosh Toosh. Get it at his site.
This is PTU kit called Don’t Bug Me from TammyKat Dezigns. Get it at PMTw/S.
The mask is Vix_Mask17, by Vix PSP.
Font used is Cartoon.


Let’s Begin!


Open a new canvas that’s 800x800 pixels.

Copy and Paste your tube as a new layer.
Resize the tube as needed to be as you like it.
For this tube I arranged the pieces together on separate layers.

Open grass72 from kit.
Copy and Paste it as a new layer.
Resize it to fit along the left as shown.
Duplicate as needed to cover the bottom of the tag as shown.

Open notebook-ladybug72 from kit.
Copy and Paste it behind the tube layer.
Resize and arrange it to the left as shown.

Open ncloud72 from kit.
Copy and Paste it as a new layer.
Resize and arrange it to the right as shown.

Open ladybug-ribbon72 from kit.
Copy and Paste it above the grass layers.
Resize and arrange it to the bottom as shown.

Open stripedfolderibbon72 from kit.
Copy and Paste it as a new layer.
Resize and arrange it to the bottom as shown.

Open sequinstitches72 from kit.
Copy and Paste it as a new layer.
Resize and arrange it to the bottom as shown.

Open 5 different sequin from kit.
Copy and Paste them as new layers.
Resize and arrange them in a cluster at the bottom as shown.

Open greenleaf72 from kit.
Copy and Paste it as a new layer.
Resize and arrange it to the bottom left as shown.

Open pinkbow72 from kit.
Copy and Paste it as a new layer.
Resize and arrange it to the bottom as shown.

Open redladybug72 from kit.
Copy and Paste it as a new layer.
Resize and arrange it to the bottom left as shown.

Open bugginworld72 from kit.
Copy and Paste it as a new layer.
Resize and arrange it to the top as shown.

Open paper cloudpaper72 from kit.
Copy and Paste it at the bottom of the tag.
Add your mask by going to Layer>Load/ Save Mask>Load Mask from Disk.
Apply the mask named Vix_Mask17.
Merge the mask group by right clicking the layer of the finished mask, go to Merge>Merge Group.
Resize and arrange it to fit as shown.

I used the font Cartoon. Set it to a size you like and a stroke width of 3.
Foreground color to white and background color to #be0a0c.
Duplicate the layer and select the second font layer with the font tool.
Set the stroke width to 0.
Merge the 2 font layer and convert to a raster layer.

Drop shadow everything except the mask.
Effects>3D Effects>Drop Shadow, set the drop to 3 vertical, 2 horizontal, 75 opacity, 4 blur.

Add your copyright info and your tag.

Merge everything in Layers>Merge>Merge Visible

Crop and resize as needed!


All Finished!

Tuesday, February 15, 2011

True Blood Sam- PTU


Download this tutorial in a PDF file.

I've used the lovely PTU artwork of Elias Chatzoudis. You can purchase it at PTE.
This is a PTU kit called True Blood: Sam by Pimp’d Designz. Visit her blog for links to her store HERE.
The mask is WSL_Mask254, by Wee Scot Lass.
Font used is Trueblood.


Let’s Begin!

Open a new canvas that’s 800x800 pixels.

Open frame-01 from kit.
Copy and Paste it as a new layer.

Copy and Paste your tube under your frame.
Resize and arrange it to fit the frame as shown.

Layers>Duplicate your frame.
Move your second frame below your tube layer.
Select the upper frame and use your eraser tool to erase portions of the frame covering the tube’s upper body.
Erase any portion of the tube hanging out of the bottom of the frame.

Open paper pp-01 from kit.
Copy and Paste it below your bottom frame.
Resize it slightly so that the right side of the paper is showing through the frame as shown.
Erase any portion of the paper hanging out.

Open stitches from kit.
Copy and Paste it below the paper.
Resize and arrange it as shown.

Open tree from kit.
Copy and Paste it as a new layer.
Resize and arrange it to the right as shown.

Open sand from kit.
Copy and Paste it above the upper frame.
Resize and arrange it to the bottom as shown.

Open thread from kit.
Copy and Paste it as a new layer.
Resize and arrange it to the bottom right as shown.

Open greens-02 from kit.
Copy and Paste it as a new layer.
Resize and arrange it to the bottom as shown.

Open ribbon-03 from kit.
Copy and Paste it as a new layer.
Resize and arrange it to the bottom right as shown.

Open ribbon-05 from kit.
Copy and Paste it as a new layer.
Resize and arrange it to the bottom as shown.

Open flower-02 from kit.
Copy and Paste it as a new layer.
Resize and arrange it to the bottom right as shown.

Open ribbon-01 from kit.
Copy and Paste it as a new layer.
Resize and arrange it as shown.

Open paper pp-10 from kit.
Copy and Paste it at the bottom of the tag.
Add your mask by going to Layer>Load/ Save Mask>Load Mask from Disk.
Apply the mask named WSL_Mask254.
Merge the mask group by right clicking the layer of the finished mask, go to Merge>Merge Group.
Resize and arrange it to fit as shown.

I used the font Trueblood. Use a size you like and a stroke width of 3.
Foreground color to white and background color to #201d1e.
Duplicate the layer and select the second font layer with the font tool.
Set the stroke width to 0.
Merge the 2 font layers and convert to a raster layer.

Drop shadow your elements by going to
Effects>3D Effects>Drop Shadow, set the drop to 3 vertical, 2 horizontal, 75 opacity, 4 blur.

Add your copyright info and your tag.

Merge everything in Layers>Merge>Merge Visible

Crop and resize as needed!


All Finished!

True Blood Jessica- PTU


Download this tutorial in a PDF file.
I've used the lovely PTU artwork of Jamie Kidd. You can purchase it at CDO.
This is a PTU kit called True Blood: Jessica by Pimp’d Designz. Visit her blog for links to her store HERE.
I’ve used masks Vix_Mask11 and 112 by Vix PSP.
Font used is Callie Hand.


Let’s Begin!

Open a new canvas that’s 800x800 pixels.

Open frame-02 from kit.
Copy and Paste it as a new layer.

Copy and Paste your tube under your frame.
Resize and arrange it to fit the frame as shown.

Layers>Duplicate your frame.
Move your second frame below your tube layer.
Select the upper frame and use your eraser tool to erase portions of the frame covering the tube’s head.
Erase any portion of the tube hanging out of the bottom of the frame.

Open paper pp-11 from kit.
Copy and Paste it below your bottom frame.
Erase any portion of the paper hanging out.

Open sparkle-01 from kit.
Copy and Paste it below the paper.
Resize and arrange it as shown.

Open flower-01 and flower-02 from kit.
Copy and Paste them above the upper frame.
Resize and arrange it to the bottom as shown.
Layers>Duplicate as needed to cover the bottom as shown.

Open butterfly from kit.
Copy and Paste it above all the flowers.
Resize and arrange it to the left as shown.

Open heart-01 from kit.
Copy and Paste it as a new layer.
Resize and arrange it to the bottom as shown.

Open string-01 from kit.
Copy and Paste it as a new layer.
Resize and arrange it to the bottom right as shown.

Open paper pp-08 from kit.
Copy and Paste it at the bottom of the tag.
Add your mask by going to Layer>Load/ Save Mask>Load Mask from Disk.
Apply the mask named Vix_Mask11.
Merge the mask group by right clicking the layer of the finished mask, go to Merge>Merge Group.
Resize and arrange it to fit as shown.
Copy and Paste paper pp-07 as a new layer.
Repeat this procedure and apply the mask named Vix_Mask112.

I used the font Callie Hand. Use a size you like and a stroke width of 3.
Foreground color to white and background color to #262458.
Duplicate the layer and select the second font layer with the font tool.
Set the stroke width to 0.
Merge the 2 font layers and convert to a raster layer.

Drop shadow your elements by going to
Effects>3D Effects>Drop Shadow, set the drop to 3 vertical, 2 horizontal, 75 opacity, 4 blur.

Add your copyright info and your tag.

Merge everything in Layers>Merge>Merge Visible

Crop and resize as needed!


All Finished!


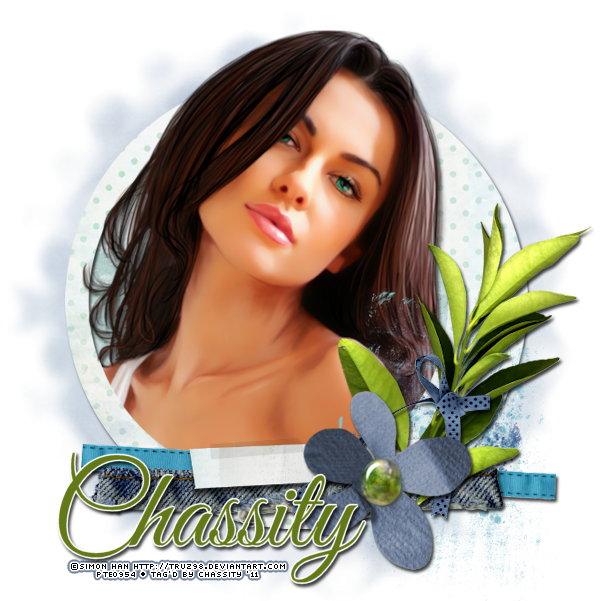
True Blood Jason- PTU


Download this tutorial in a PDF file.
I've used the lovely PTU artwork of Simon Han. You can purchase it at PTE.
This is a PTU kit called True Blood: Jason by Pimp’d Designz. Visit her blog for links to her store HERE.
The mask is WSL_Mask25, by Wee Scot Lass.
Font used is Good Vibrations ROB.


Let’s Begin!

Open a new canvas that’s 800x800 pixels.

Open frame-02 from kit.
Copy and Paste it as a new layer.
Resize it smaller a little to give yourself more room to work, and center.

Copy and Paste your tube under your frame.
Resize and arrange it to fit the frame as shown.

Layers>Duplicate your frame.
Move your second frame below your tube layer.
Select the upper frame and use your eraser tool to erase portions of the frame covering the tube’s head.

Open paper pp-01 from kit.
Copy and Paste it below your bottom frame.
Erase any portion of the paper hanging out.

Open print-01 from kit.
Copy and Paste it above the upper frame.
Resize and arrange it to the bottom right as shown.

Open ribbon-01 from kit.
Copy and Paste it as a new layer.
Resize and arrange it to the bottom as shown.

Open jean-02 from kit.
Copy and Paste it as a new layer.
Resize and arrange it to the bottom as shown.

Open journal from kit.
Copy and Paste it as a new layer.
Resize and arrange it to the bottom as shown.

Open greens-01 from kit.
Copy and Paste it as a new layer.
Resize and arrange it to the right as shown.

Open ribbon-02 from kit.
Copy and Paste it as a new layer.
Resize and arrange it to the right as shown.

Open flower-01 from kit.
Copy and Paste it as a new layer.
Resize and arrange it to the bottom right as shown.

Open paper pp-06 from kit.
Copy and Paste it at the bottom of the tag.
Add your mask by going to Layer>Load/ Save Mask>Load Mask from Disk.
Apply the mask named WSL_Mask25.
Merge the mask group by right clicking the layer of the finished mask, go to Merge>Merge Group.
Resize and arrange it to fit as shown.

I used the font Good Vibrations ROB. Use a size you like and a stroke width of 3.
Foreground color to white and background color to #91ab1f.
Duplicate the layer and select the second font layer with the font tool.
Set the stroke width to 0.
Merge the 2 font layers and convert to a raster layer.

Drop shadow your elements by going to
Effects>3D Effects>Drop Shadow, set the drop to 3 vertical, 2 horizontal, 75 opacity, 4 blur.

Add your copyright info and your tag.

Merge everything in Layers>Merge>Merge Visible

Crop and resize as needed!


All Finished!


Monday, February 14, 2011

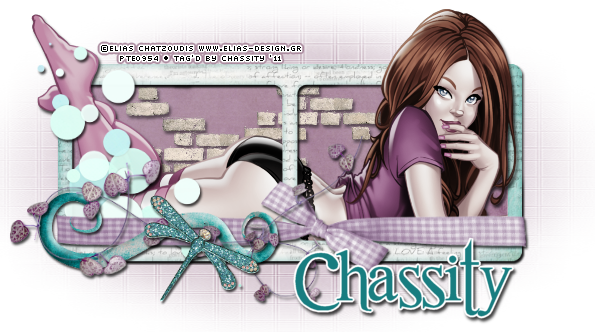
True Blood Tara- PTU


Download this tutorial in a PDF file.
I've used the lovely PTU artwork of Elias Chatzoudis. You can purchase it at PTE.
This is a PTU kit called True Blood: Tara by Pimp’d Designz. Visit her blog for links to her store HERE.
The mask is WSL_Mask62, by Wee Scot Lass.
Font used is Romance Fatal Serif.


Let’s Begin!


Open a new canvas that’s 800x800 pixels.

Open frame-03 from kit.
Copy and Paste it as a new layer.
Resize it smaller a little to give yourself more room to work, and center.

Copy and Paste your tube under your frame.
Image>Mirror
Resize and arrange it to fit the frame as shown.
Layers>Duplicate the tube.
On the bottom tube layer, change it to black and white by going to
Effects>Photo Effects>Black and White Film
Set the Brightness and Clarify to 0
On the upper tube layer, change the blend mode to soft light by going to
Layers>Properties and change the Blend Mode to Soft Light.

Layers>Duplicate your frame.
Move your second frame below your tube layer.
Select the upper frame and use your eraser tool to erase portions of the frame covering the tube’s head and feet.

Open paper pp-09 from kit.
Copy and Paste it below your bottom frame.
Resize it to fit behind the frame and erase any portion hanging out.

Open bricks from kit.
Copy and Paste it as a new layer.
Resize and arrange it to the left as shown.
Layers>Duplicate and move it to the right and up some.
Erase any portion of the bricks hanging outside of the frame.

Open circles from kit.
Copy and Paste it above the upper frame layer.
Resize and arrange it to the left as shown.

Open ribbon-02 from kit.
Copy and Paste it as a new layer.
Resize and arrange it to the bottom as shown.

Open swirl-02 from kit.
Copy and Paste it as a new layer.
Resize and arrange it to the left as shown.

Open string-01 from kit.
Copy and Paste it as a new layer.
Resize and arrange it to the bottom as shown.

Open dragonfly from kit.
Copy and Paste it as a new layer.
Resize, rotate and arrange it to the bottom as shown.

Open paper pp-09 from kit.
Copy and Paste it at the bottom of the tag.
Add your mask by going to Layer>Load/ Save Mask>Load Mask from Disk.
Apply the mask named WSL_Mask62.
Merge the mask group by right clicking the layer of the finished mask, go to Merge>Merge Group.
Resize and arrange it to fit as shown.

I used the font Romance Fatal Serif. Use a size you like and a stroke width of 4.
Foreground color to white and background color to #187d80.
Duplicate the layer and select the second font layer with the font tool.
Set the stroke width to 0.
Merge the 2 font layers and convert to a raster layer.

Drop shadow everything except the duplicated tube and the mask.
Effects>3D Effects>Drop Shadow, set the drop to 3 vertical, 2 horizontal, 75 opacity, 4 blur.

Add your copyright info and your tag.

Merge everything in Layers>Merge>Merge Visible

Crop and resize as needed!


All Finished!


True Blood Lafayette- PTU


Download this tutorials in a PDF file.
I've used the lovely PTU artwork of PinUp Toons. You can purchase it at CDO.
This is a PTU kit called True Blood: Lafayette by Pimp’d Designz. Visit her blog for links to her store HERE.
The mask is WSL_Mask65, by Wee Scot Lass.
Font used is The King & Queen.


Let’s Begin!


Open a new canvas that’s 800x800 pixels.

Open frame-04 from kit.
Copy and Paste it as a new layer.
Resize it smaller a little to give yourself more room to work, and center.

Copy and Paste your tube under your frame.
Resize and arrange it to fit the frame as shown.

Layers>Duplicate your frame.
Move your second frame below your tube layer.
Select the upper frame and use your eraser tool to erase portions of the frame covering the tube’s head and feet.

Open paper pp-08 from kit.
Copy and Paste it below your bottom frame.
Resize it to fit behind the frame and erase any portion hanging out.

Open mat from kit.
Copy and Paste it behind the paper layer.
Resize and arrange it as shown.

Open glitter-01 from kit.
Copy and Paste it above the upper frame layer.
Resize and arrange it to the bottom as shown.

Open print-01 from kit.
Copy and Paste it as a new layer.
Resize and arrange it to the bottom as shown.

Open belt from kit.
Copy and Paste it as a new layer.
Resize and arrange it to the bottom as shown.

Open stars-02 from kit.
Copy and Paste it as a new layer.
Resize and arrange it to the right as shown.

Open ribbon-02 from kit.
Copy and Paste it as a new layer.
Resize and arrange it as shown.

Open swirl-01 from kit.
Copy and Paste it as a new layer.
Resize and arrange it to the right as shown.

Open stars-01 from kit.
Copy and Paste it as a new layer.
Resize and arrange it to the right as shown.

Open lights from kit.
Copy and Paste it as a new layer.
Resize and arrange it to the left as shown.
Erase the upper portion of the strings that are hanging above the frame.

Open paper pp-07 from kit.
Copy and Paste it at the bottom of the tag.
Add your mask by going to Layer>Load/ Save Mask>Load Mask from Disk.
Apply the mask named WSL_Mask65.
Merge the mask group by right clicking the layer of the finished mask, go to Merge>Merge Group.
Resize and arrange it to fit as shown.

I used the font The King & Queen. Use a size you like and a stroke width of 4.
Foreground color to white and background color to black.
Duplicate the layer and select the second font layer with the font tool.
Set the stroke width to 0.
Merge the 2 font layers and convert to a raster layer.

Drop shadow everything except the duplicated tube and the mask.
Effects>3D Effects>Drop Shadow, set the drop to 3 vertical, 2 horizontal, 75 opacity, 4 blur.

Add your copyright info and your tag.

Merge everything in Layers>Merge>Merge Visible

Crop and resize as needed!


All Finished!