Monday, August 16, 2010

Angelic- FTU


Now you can download a PDF copy of this tutorial to do without using your internet browser.
Download Here
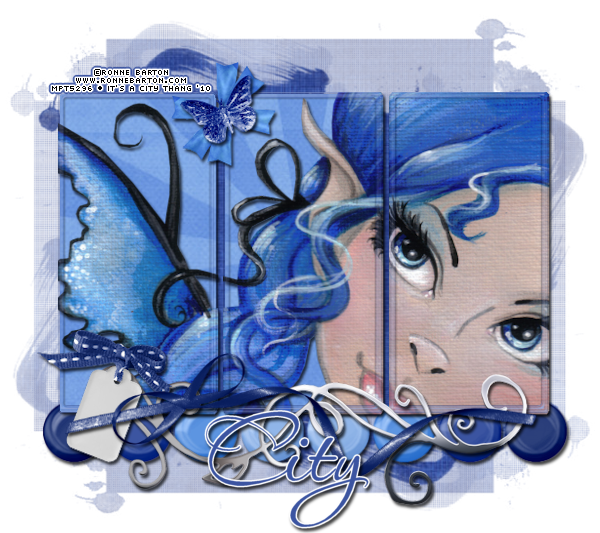
I've used the PTU artwork of Elias Chatzoudis. You can buy it HERE.
This is a FTU kit called Angelic by Toxic Desirez. Get it on her blog HERE.
The mask is called Becky_Mask038. I will honestly say that I have no idea where I got it so I will add it in my supplies. If you know where it’s from please don’t hesitate to let me know.
It's been brought to my attention that the mask is by Becky of Secrets of the Imagination.  Unfortunately her site is closed so I will continue to supply it in my supplies.
It’s of course for personal use only. Download it HERE.
Font used is Aquarelle.


Let’s Begin!

Open a new canvas 800x800 pixels.

Copy and Paste your tube to your canvas.

Open cloud1 from kit.
Copy and Paste it as a new layer.
Resize and arrange it to the bottom of the tube as shown.

Open moon from kit.
Copy and Paste it behind your tube.
Resize and arrange it to the upper right as shown.

Open splat1 from kit.
Copy and Paste it as a new layer.

Open rainbow from kit.
Copy and Paste it as a new layer.
Resize and arrange it as shown.
Using your eraser tool, set it to opacity 50% and erase the hard edges on the sides.

Open blossom1 from kit.
Copy and Paste it as a new layer.
Resize and arrange it to the left as shown.
Layer>Duplicate and Image>Mirror

Open feather from kit.
Copy and Paste it as a new layer.
Resize and arrange it to the left as shown.

Open star border from kit.
Copy and Paste it above the cloud layer.
Resize and arrange it to the right as shown.
Go to Adjust>Add/Remove Noise>Add Noise and set it to 50%

Open bow1 from kit.
Copy and Paste it as a new layer.
Resize and arrange it to the right as shown.

Open diamond from kit.
Copy and Paste it as a new layer.
Resize and arrange it into one of the positions on the cloud.
Layer>Duplicate another 6 times (or to your liking) and arrange it around the cloud.

Open paper16 from kit.
Copy and Paste it at the bottom layer of the tag.
Add your mask by going to Layer>Load/ Save Mask>Load Mask from Disk.
Apply the mask named Becky_Mask038.
Merge the mask group by right clicking the layer of the finished mask,
go to Merge>Merge Group.
Resize and arrange it as needed.

I used the font Aquarelle. Set it to a size you like, and a stroke width of 5.
Foreground color to white and background color to #7cb4b8.
Duplicate the layer and select the second font layer with the font tool.
Change the foreground color to #eb8bbb. On the background color set it to gradient so that the two colors show.
Set the stroke width to 0.
Add noise to this layer by going to Adjust>Add/Remove Noise>Add Noise and set it to 50%
Merge the 2 font layer and convert to a raster layer.

Drop shadow everything except the rainbow by going to
Effects>3D Effects>Drop Shadow, set the drop to 3 vertical, 2 horizontal, 75 opacity, 4 blur.

Add your copyright info and your tag.

Merge everything in Layers>Merge>Merge Visible

Crop and Resize your tag as needed.

All Finished!

Saturday, August 14, 2010

The Girl- FTU


Now you can download a PDF copy of this tutorial to do without using your internet browser.
Download Here
I've used the FTU artwork of Psyco Jimi. You still need a license through MtA to use his work, which you can get for free HERE.
You'll need your license number to join the group HERE.
This is a FTU kit called Toxic Candyland by Cinnamon Scraps. You can get it HERE.
I've used Template “I’m the Girl You Will Never Be” by Crazy Cakes Scraps. You can get it HERE.
The diamond doesn’t have a home and the fairy dust was created by me. These items are in my supplies which are for personal use only. You can download HERE.
I used mask Vix_Mask362 by Vixen. Download it on her blog HERE.
Font used is WaterBrush ROB.


Let’s Begin!


Open the tag template. I’ve resized the template to 700x700 by going to Image>Resize and then resize the canvas from the center to 800x800 by going to Image>Canvas Size.
Delete the credits layer.

Open paper11 from the kit.
Copy your paper and go to the template.
On the layer named halfcircle, go to Selections>Select All, Selections>Float, Selections>Defloat.
Paste your paper by going to Edit>Paste As New Layer.
Then go to Selections>Invert and press the Delete button on your keyboard to delete the extra paper.
Go to Selections>None
Be sure to delete the original layer of the template.
(Follow this procedure when asked to Copy and Paste a paper to a layer of the template.)

Copy and Paste the following papers to the layers stated:

Paper14 to blackcircle
Paper15 to rectangle
Paper1 to oval
Paper8 to silverrectangle
Paper3 to circle1 and circle2
Paper4 to smcircle and smcircle2

Move the small circle2 down a little as shown in the tag.

Copy and Paste your tube of choice above the glitterframe layer.
Resize and arrange it to fit in the center as shown.

Copy and paste the same tube above circle1 (black circle).
Resize and arrange it so the face of the tube is above the circle.
On the circle layer go to Selections>Select All, Selections>Float, Selections>Defloat.
Select the tube layer and go to Selections>Invert and press the Delete button on your keyboard.
Selections>None
Duplicate the tube layer by going to Layers>Duplicate
On the bottom tube layer change the blend mode by going to
Layers>Properties and change the Blend Mode to Luminance (Legacy)
On the upper tube layer go to Adjust>Blur>Gaussian Blur and set the radius to 3.
Change its blend mode to Soft Light.

Repeat this entire procedure for the other circle.
Mirror the tube by going to Image>Mirror before arranging the way you want.

I’ve used a second tube for the oval behind the main tube.
Copy and Paste your tube of choice above the oval.
Resize and arrange to the side so it is facing outward.
Use the Select All/Float/Defloat method to delete the extra portion of the tube.
Layers>Duplicate the tube.
On the bottom tube change the blend mode to Luminance (Legacy).
Change its opacity to 50% in the Layer Properties as well.
On the upper tube change the blend mode to Soft Light.

Repeat this entire procedure for the other side of the oval.
Mirror the tube by going to Image>Mirror before arranging the way you want.

Open diamond from my supplies.
Copy and Paste it above the glitter frame.
Arrange it to the left where the oval meets the rectangles.
Layer>Duplicate it 5 times and arrange them around the oval as shown.

Open flower3 from kit.
Copy and Paste it as a new layer.
Resize and arrange it behind the elbow on the right as shown.
Layer>Duplicate, Image>Mirror

Open flower1 from kit.
Copy and Paste it above the last skinny rectangle before the circles.
Resize and arrange it as shown in the tag.

Open flower6 from kit.
Copy and Paste it as a new layer.
Image>Mirror
Resize and arrange it as shown in the tag.

Open bow9 from kit.
Copy and Paste it above the 2 small circles.
Resize and arrange it above the circle as shown.

Open string2 from kit.
Copy and Paste it as a new layer.
Resize and arrange it to the bottom as shown.

Open fairy dust from my supplies.
Copy and Paste it as a new layer.

Open paper1 from kit.
Copy and Paste it at the bottom layer of the tag.
Add your mask by going to Layer>Load/ Save Mask>Load Mask from Disk.
Apply the mask named Vix_Mask362.
Merge the mask group by right clicking the layer of the finished mask,
go to Merge>Merge Group.

I used the font WaterBrush ROB. Set it to a size you like, and a stroke width of 3.
Foreground color to white and background color to black.
Duplicate the layer and select the second font layer with the font tool.
Set the stroke width to 0.
Merge the 2 font layer and convert to a raster layer.

Drop shadow everything by going to
Effects>3D Effects>Drop Shadow, set the drop to 3 vertical, 2 horizontal, 75 opacity, 4 blur.

Add your copyright info and your tag.

Merge everything in Layers>Merge>Merge Visible

You can crop and resize your image as desired.


All Finished!

Bluetonic- PTU


Now you can download a PDF copy of this tutorial to do without using your internet browser.

You can use a tube of choice.
I've used an FTU tube by Ronne Barton which was available at MPT but is no longer there.
This is a PTU kit called Bluetonic by Seven’s Scraps. You can visit her blog for links to her stores HERE.
The mask is WSL_Mask359, by Wee Scot Lass. You can get it HERE.
Font used is Aquarelle.


Let’s Begin!


Open a new canvas 800x800.

Open paper 12 from kit.
Copy and Paste it as a new layer.

Copy and Paste your tube as a new layer.

Open frame02 from kit.
Copy and Paste it as a new layer.
Resize it slightly if needed so that the tube fits within frame.
Using your magic wand tool select on the outside of the frame so the extra space outside of the frames are selected.
Go to Selections>Modify>Expand, and expand by 2.
Select your tube layer and hit the Delete button on your keyboard to delete the excess.
Select the paper layer and hit the Delete button.

Open flowerbow03 from kit.
Copy and Paste it above the kit.
Resize and arrange it to the upper left.

Open butterfly01 from kit.
Copy and Paste it as a new layer.
Resize and arrange it above the flower bow.

Open doodle03 from kit.
Copy and Paste it as a new layer.
Image>Mirror
Resize and arrange it to the bottom of the frame.

Open tag03 from kit.
Copy and Paste it as a new layer.
Resize and arrange it to the left.

Open ribbon05 and from kit.
Copy and Paste it as a new layer.
Resize and arrange it at the bottom of the tag.

Open buttons01 from kit.
Copy and Paste it below the paper behind the frame.
Resize and arrange it to the bottom of the frame.

Open paper22 from kit.
Copy and Paste it at the bottom, below the buttons.
Add your mask by going to Layer>Load/ Save Mask>Load Mask from Disk.
Apply the mask named WSL_Mask359.
Merge the mask group by right clicking the layer of the finished mask, go to Merge>Merge Group.

I used the font Aquarelle. Use a size you like and a stroke width of 3.
Foreground color to white and background color to #3b54a1.
Duplicate the layer and select the second font layer with the font tool.
Set the stroke width to 0.
Merge the 2 font layers and convert to a raster layer.

Drop shadow everything except the frame.
Effects>3D Effects>Drop Shadow, set the drop to 3 vertical, 2 horizontal, 75 opacity, 4 blur.

Add your copyright info and your tag.

Merge everything in Layers>Merge>Merge Visible

Crop and Resize as you like.


All Finished!

Saturday, August 7, 2010

California Girl- PTU


Now you can download a PDF copy of this tutorial to do without using your internet browser.
Download Here
I've used the lovely PTU artwork of Elias Chatzoudis. You can purchase the art HERE.
This is a PTU kit called California Girls from Cora’s Creations (Pimp'd Designz). Visit her blog for links to her store HERE.
I used Template 327 by Missy at Divine Intentionz. You can get it HERE.
The mask is WSL_Mask192, by Wee Scot Lass. You can get it HERE.
Font used is Carpenter.


Let’s Begin!

Open the tag template, and resize the canvas from the center to 800x800 by going to
Image>Canvas Size.
Delete the credit layers, the wordart layer, hearts layer, and dotted lines.

Open paper pp06 from the kit.
Copy your paper and go to the template.
On your layer named frame background 1, go to Selections>Select All, Selections>Float, Selections>Defloat.
Paste your paper by going to Edit>Paste As New Layer.
Then go to Selections>Invert and press the Delete button on your keyboard to delete the extra paper.Selections>Select None
Be sure to delete the original layer of the template.

Follow the procedure for the following papers and their layer:

Paper pp06 to frame background 2
Paper pp08 to circle 1
Paper pp12 to circle 2
Paper pp01 to circle 03
Paper pp10 to raster 1 (black rectangle)

On layers named frame1 and frame2, add noise.
Go to Adjust>Add/Remove Noise>Add Noise
Select Uniform and Monochrome, and set the noise to 75%.

Copy and Paste your close-up tube (if you have one) above the top circle.
I’ve mirrored the tube by going to Image>Mirror.
Once you have it where you like it, select the circle layer.
Go to Selections>Select All, Selections>Float, Selections>Defloat.
Select the tube layer and go to Selections>Invert.
Hit the Delete key on the keyboard.
Selections>Select None
Image>Duplicate the tube.
On the bottom tube change the Layer Properties to Luminance by going to
Layers>Properties and change the blend mode to Luminance (Legacy).
On the top tube layer change the Layer Properties to Soft Light.

Open glitter01 from kit.
Copy and Paste it above the green rectangle layer.
Resize and arrange it as shown.

Open flower02 from kit.
Copy and Paste it above the orange circle layer.
Resize and arrange it to the left as shown.

Open sun from kit.
Copy and Paste it above the pink circle layer.
Resize and arrange it to the right as shown.

Open surfboard from kit.
Copy and Paste it above the close-up tube.
Resize and arrange it to the left as shown.

Open ribbon04 from kit.
Copy and Paste it as a new layer.
Resize and arrange it as shown.

Open swirl01 from kit.
Copy and Paste it as a new layer.
Resize and arrange it as shown.

Open hearts01 from kit.
Copy and Paste it as a new layer.
Resize and arrange it as shown.

Open ribbon03 from kit.
Copy and Paste it as a new layer.
Resize and arrange it as shown.

Open starfish from kit.
Copy and Paste it as a new layer.
Resize and arrange as shown.

Open wordart02 from kit.
Copy and Paste it as a new layer.
Resize and arrange it as shown.

Open flower01 from kit.
Copy and Paste it as a new layer.
Resize and arrange it as shown.

Open paper pp09 from kit.
Copy and Paste it at the bottom of the tag.
Add your mask by going to Layer>Load/ Save Mask>Load Mask from Disk.
Apply the mask named WSL_Mask192.
Merge the mask group by right clicking the layer of the finished mask, go to Merge>Merge Group.
Resize and arrange it to fit as shown.

I used the font Carpenter. Use a size you like and a stroke width of 3.
Foreground color to white and background color to #eb6789.
Duplicate the layer and select the second font layer with the font tool.
Set the stroke width to 0.
Merge the 2 font layers and convert to a raster layer.

Drop shadow everything except the duplicated tube and the mask.
Effects>3D Effects>Drop Shadow, set the drop to 3 vertical, 2 horizontal, 75 opacity, 4 blur.

Add your copyright info and your tag.

Merge everything in Layers>Merge>Merge Visible


All Finished!