Wednesday, April 14, 2010

Springlicious- PTU


Now you can download a PDF copy of this tutorial to do without using your internet browser.
Download Here
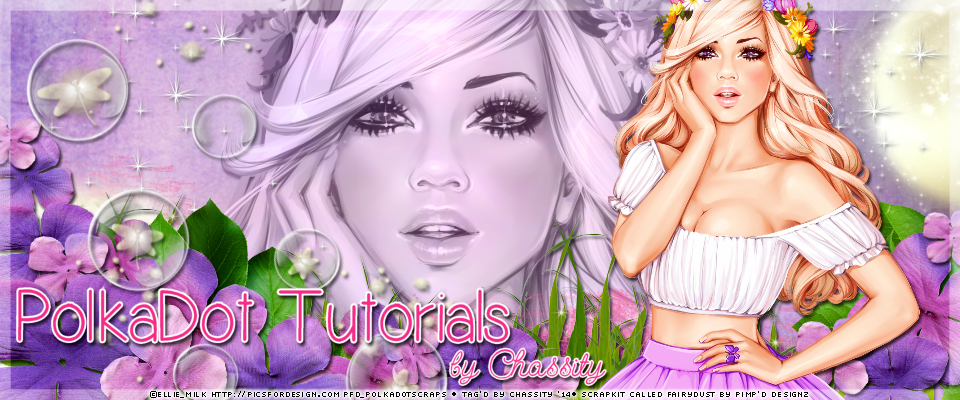
I've used the lovely PTU artwork of Shawli. You can purchase her art HERE.
This is a PTU kit called Springlicious by Seven’s Scraps. You can visit her blog for links HERE.
The mask is provided in my supplies which is for personal use only! You can download it HERE.
Font used is Aquarelle.


Let’s Begin!

Open a new canvas, 800x800 pixels.

Open frame20 from kit.
Copy and Paste it as a new layer onto your canvas.

Open papers 27 from kit.
Using the magic wand select inside the open area of the frame.
Selections>Modify>Expand by 5.
Copy your paper and paste as a new layer.
Selections>Invert and hit the delete button on your keyboard.
Selections>None and move the paper layer below the frame.

Copy and Paste your tube on top of the frame.
Arrange it to the left.
Layer>Duplicate and Image>Mirror the tube
and move the tube behind the frame.
Resize and arrange it as shown, erasing portions of the tube hanging outside of the frame.
Layer>Duplicate, Adjust>Blur>Gaussian Blur- 3
Layer>Properties and set the Blend Mode to Soft Light
On the lower tube set the Blend Mode to Luminance (Legacy)

Open the following elements in the following order.
Copy and Paste them starting above the frame layer and
Resize and arrange as shown.

Paperdoodle02
String02
Ribbon05
Flower09 (duplicate 2 times and arrange)
Flower05
Butterfly01
Pearls02
Shamrock04 (Image>Mirror)
Shamrock01

Open paper13 from kit.
Copy and Paste it at the bottom of the tag.
Add your mask by going to Layer>Load/ Save Mask>Load Mask from Disk.
Apply the mask named 2 from supplies.
Merge the mask group by right clicking the layer of the finished mask, go to Merge>Merge Group.
Change the opacity of the mask layer to 50%

I used the font Aquarelle. Set it a size you like and a stroke width of 5.
Foreground color to white and background color to #b14555.
Duplicate the layer and select the second font layer with the font tool.
Set the stroke width to 0.
Merge the 2 font layer and convert to a raster layer.

Drop shadow everything except the mask.
Effects>3D Effects>Drop Shadow, set the drop to 3 vertical, 2 horizontal, 50 opacity, 4 blur.

Add your copyright info and your tag.

Merge everything in Layers>Merge>Merge Visible

All Finished!

Tuesday, April 13, 2010

Fan Club- PTU


Now you can download a PDF copy of this tutorial to do without using your internet browser.
I've used the lovely FTU artwork of Psyco Jimi. It’s free but you have to apply for a MtA license and join the Yahoo group. Start the process HERE.
This is PTU kit called Flashback from Cora’s Creations Pimp'd Designz). Visit her blog for links to her store HERE.
I used Template 340 by Missy at Divine Intentionz. You can get it HERE.
The mask is WSL_Mask44, by Wee Scot Lass. You can get it HERE.
Font used is Pussycat.


Let’s Begin!

Open the tag template, and resize the canvas from the center to 800x800 by going to
Image>Canvas Size.
Delete the credits layer.

Open paper pp04 from the kit.
Copy your paper and go to the template.
On your black circle2 layer, go to Selections>Select All, Selections>Float, Selections>Defloat.
Paste your paper by going to Edit>Paste As New Layer.
Then go to Selections>Invert and press the Delete button on your keyboard to delete the extra paper.
Be sure to delete the original layer of the template.
(Follow this procedure when asked to Copy and Paste a paper to a layer of the template.)

Copy and Paste the following papers to the following layers of the template:

Paper pp-01 to layers shape 3 and 4
Paper pp-03 to layers shape 1 and 2
Paper pp-11 to layer circle1

On layers named thin rectangle 1 and 2, and glittered circle, add noise by going to
Adjust>Add/Remove Noise>Add Noise- 90%.

Copy and paste your tube above layer frame1.
Resize and arrange to the right of tag.
Paste tube above framebackground1 and
Image>Mirror
Arrange it in your frame then on the frame layer,
Selections>Select All, Selections>Float, Selections>Defloat
Select your tube layer then go to
Selections>Invert and press the Delete button on your keyboard to delete the extra.
Duplicate your tube by going to Layer>Duplicate.
On that duplicated tube layer go to Adjust>Blur>Gaussian Blur- 3
Go to Layers>Properties>Blend Mode to Soft Light
On the bottom tube change the blend mode to Luminance (Legacy)

Open epoxy-spill from kit.
Copy and Paste it above the thin rectangles.
Resize and arrange it to the left.
Layer>Duplicate, Image>Mirror, Image>Flip

Open beads-03 from kit.
Copy and Paste it above the circles.
Resize and arrange it as shown.

Open ribbon-02 from kit.
Copy and Paste it as a new layer.
Resize and arrange it as shown.

Open heart-01 from kit.
Copy and Paste it as a new layer.
Resize and arrange it as shown.

Open bff bracelet from kit.
Copy and Paste it under the main tube.
Resize and arrange as shown.

Open star-02 from kit.
Copy and Paste it as a new layer.
Resize and arrange it as shown.

Open paper pp10 from kit.
Copy and Paste it at the bottom of the tag.
Add your mask by going to Layer>Load/ Save Mask>Load Mask from Disk.
Apply the mask named WSL_Mask44.
Merge the mask group by right clicking the layer of the finished mask, go to Merge>Merge Group.
Resize and arrange it to fit as shown.

I used the font Pussycat. Use a size you like and a stroke width of 3.
Foreground color to white and background color to black.
Duplicate the layer and select the second font layer with the font tool.
Set the stroke width to 0.
Merge the 2 font layers and convert to a raster layer.

Drop shadow everything except the duplicated tube and the mask.
Effects>3D Effects>Drop Shadow, set the drop to 3 vertical, 2 horizontal, 75 opacity, 4 blur.

Add your copyright info and your tag.

Merge everything in Layers>Merge>Merge Visible


All Finished!

Monday, April 12, 2010

Easter Time- PTU


Now you can download a PDF copy of this tutorial to do without using your internet browser.
I've used the lovely PTU artwork of Suzanne Woolcott of Gorjuss. You can purchase her art and a license HERE.
This is a PTU kit called Precious Easter by Seven’s Scraps. You can visit her blog for links HERE.
The mask is by Kirsty’s Scraps. Download it on her blog HERE.
The image and animation are in my supplies, which are for personal use only. Download them HERE.
Font used is Problem Secretary.
You will need an animation program like Animation Shop 3 to complete the animation portion of this tutorial.


Let’s Begin!


Open a new canvas, 800x800 pixels.

Open frame28 from kit.
Copy and Paste it as a new layer onto your canvas.

Copy and Paste your tube as a new layer.
Arrange it in the left of the frames.

Open image from supplies.
Copy and Paste it as a new layer behind the frame.
Resize and arrange it as shown in tag.
Erase any portions of the image hanging out.

Open the following elements and Copy and Paste them in this order above the frame.
Resize and arrange them as shown in the tag.

Fence02
Grass02 (twice)
Ribbon03
Leaf08
Flower04
Flower08
Bow06
Butterfly04
Egg06
Bubbles01
Flower12
Leaf01

Open paper08 from kit.
Copy and Paste it at the bottom, below the frame.
Add your mask by going to Layer>Load/ Save Mask>Load Mask from Disk.
Apply the mask named Kirsty06_Mask_24.
Merge the mask group by right clicking the layer of the finished mask, go to Merge>Merge Group.

I used the font Problem Secretary. Set it to a size you like, and a stroke width of 5.
Foreground color to white and background color to #564c94.
Duplicate the layer and select the second font layer with the font tool.
Set the stroke width to 0.
Merge the 2 font layer and convert to a raster layer.

Drop shadow everything except the light and the mask.
Effects>3D Effects>Drop Shadow, set the drop to 3 vertical, 2 horizontal, 50 opacity, 4 blur.

Add your copyright info and your tag.

Merge everything in Layers>Merge>Merge Visible


Animation

Open the tag in Animation Shop.
Right click on the tag and duplicate it until you have 4 frames.

Open the animation from the supplies.
Go to Edit>Select All, Edit>Copy

Go to the tag with the first frame selected,
Go to Edit Select All, Edit>Paste Into Selected Frame

Your animation will show up at the end of your mouse cursor.
Use this to position the animation where you would like over the image and click to paste.
This will paste all four frames of the animation onto all four frames of the tag making the animation seamless.

You may need to undo and retry over and over until you get it the way you want it!
Once you’re all set you are able to view your animation and save as a GIF file!


All Finished!